Rotary Speaker MKIII - isolation cabinet - Part 1

Part 1

First, a little background...

If you don't know what a rotary speaker is, Google "Jimmy Smith" or "Leslie speaker".

Constructing rotary speakers is an intermittent hobby of mine. In 2011 I built my first from salvaged parts - a motor from a tape deck spinning a coffee filter over an old Fostex speaker, the speed adjusted by a PC fan controller. Here it is:


It garnered a favourable response on YouTube, so I embarked on a more elegant approach, still using salvaged parts but with a little more thought and care going into the design. It took a couple of years to get round to making it but here's the result:


It hasn't received as many views or comments as the first - not that surprising since I make next to no effort to promote my online presence but I feel it was a step forward...

One issue with these things is they have to be mic'ed up to record the effect. So I got to thinking that some kind of isolation could be a solution. Now, some six years later, I find myself ready to move on the next stage - a rotary speaker enclosed in an isolation cabinet. Quite frankly, this is a fool's errand - much easier, and probably much better sounding, would be to use a rotary effects pedal, for which I already have several options. But my hobby is making things so that's what I'm doing.

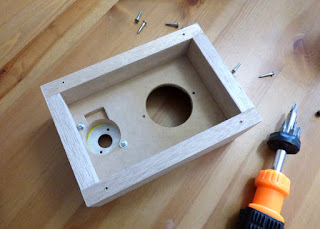
Although the build is nearing completion, I'll be posting it in instalments as it's been quite an undertaking and I'd like to keep things more manageable. For now, here are the early stages, showing some prototyping along the way.

Here's the rotary mechanism and speaker built into a box. I seem to recall the motor came from an ink-jet printer - it's rated for 12 volts DC. It's rotating a 'tube' mounted above the speaker. The 'tube' (for want of a better word) is an assemblage of plastic parts including sections of a cotton reel, cap from a wood glue bottle and 35mm film canister. At it's heart is a short length of ABS pipe which slides over an aluminium spindle centred over the speaker. Silicon grease helps it spin smoothly and somewhat silently.


This is the box viewed from below showing the motor on the left and speaker to the right. This was still at a prototyping stage - the speaker here has since been upgraded to one that can better handle the frequencies and volume anticipated.


Again, some prototyping. The cone shown here mounted on the tube is an entirely paper construction but I've since opted for a piece of PVC duct pipe which has a wider diameter and seems to improve the overall sound.


Part 2 to follow soon - it involves concrete!

Comments

Popular posts from this blog

Yamaha PS-30 : Solo Section Filter and De-tune Mods

Behind the Yamaha PS-30's "Solo" section, there's a simple monophonic analogue synth. Here's how I brought the filter and tuning controls to the front panel...Quite simple, it's involves removing 3 trimmer pots from the PCB and replacing them with regular potentiometers mounted on the front panel. First, however, much gratitude goes to the excellent Table Hooters site for the detailed information on this keyboard's inner workings: http://weltenschule.de/TableHooters/Yamaha_PS-30_PS-20.html       (click images to enlarge) My Yamaha PS-30 - the green, blue and red knobs (top right) control de-tune, cut-off frequency and resonance respectively You can already access the solo section's tuning control via a removable plug on the back of the case: Removing this plug allows access to a trimmer pot on the PCB. I replaced this with a regular pot mounted on the front panel. Back of case removed... The solo section PCB is the shaded area on t...

Casiotone CT-310 external clock sync

The older Casiotone keyboards with analogue circuitry can generally be modified to accept external clock signals for synchronising their rhythms to other equipment - but there are a few caveats: 1. there are various Casiotone 'families' based on different chipsets and implementations. This means there's no standard way to do this across all models and even models that share the same CPU might be programmed differently. For example, with an external clock signal, the CT-310 and the MT-65 sync at the same tempo while the MT-86 plays at half their speed. 2. the mod outlined below might not deliver a rock solid sync - the resultant system can be prone to glitches unless buffered in some way, so making adjustments to tempo on the fly or switching other gear on and off, can cause things to go awry. 3. there are various  sync signal formats in use, (12 ,  24 or 48 ppqn being common), however, these do not apply to the Casiotones. With the mod below, they require multiplying ...

Ganged Switch Wiring

Just an image to show how to wire ganged switches as an alternative to using a potentiometer with an Arduino, or similar. This allows the user to instantly jump to a desired setting/option with precision. Here are some ganged switches (the six blue buttons) to select patterns on a build of jan ostman's O2 Minipops drum machine: The dark grey button to the left selects between banks for a total of 12 patterns. Note: A simpler (but less speedy) option would be to use a rotary switch. As in the build below: